
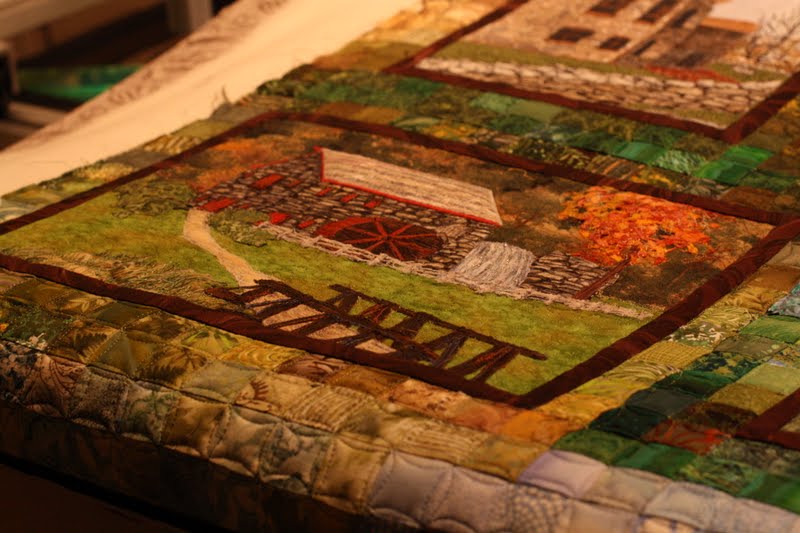
Above you can see a peak at the Guild's second Massachusetts historical buildings quilt. The first quilt has gone off to another member for binding and a hanging sleeve. Another member will make the labels and we will all try to sell the lucky ticket(s).
A group effort.
I've invited guild members to follow along in the quilting process.
Lots of pretty threads were used to quilt our quilts and below you can see some of them.

I'm using a longarm and if you are not familiar with this type of machine, you can see mine below.
The machine has wheels and rides along on a track. It rides over the quilt as opposed to a sit down machine where you push the quilt through. Looking at the picture, the left side of the machine is the front and the right side is the back. You can sew from both sides. For this quilt, I'm sewing from the front.
The thread sits on a spool holder towards the back of the machine and is threaded through various loops and knobs and ends at the machine's needle which is on the front.

The quilt backing and top are attached to the rails which are covered in canvas. Below you can see the backing. I like to use flat pins, although there all kinds of great, new systems for attaching to your frame.
If you think of your backing and quilt top as the top of a table you can begin to understand why your quilter likes your top and back to be square. There is no place for extra fabric to go when working in opposite parallel lines.

Once the layers are attached, the whole system works much like a hand quilting frame.
Stabilizing or stitching in the ditch is important for this type of detail quilting. This gives the quilt a crisp look and keeps your layers together while you add your detail quilting. Some people can do this freely and others use a ruler to guide the machine into the ditch of the two fabric joins. Below you can see the ruler up against the foot. If I was doing this in real life, my left hand would be holding the ruler and my right hand would be driving.

Once your three layers are stabilized you can go back and forth to different areas of the quilt. So, say- I'm using a grey thread; I can complete the blocks that require grey thread and then I can move to green or whatever thread I want.
So that's all part of the process, now stay tuned and I'll show you some more pictures of our second raffle quilt.
...and because some of you have been asking.... scroll down.
he is doing great.

= )
5 comments:
APQS? Looks like it. Hope so, I need an expert from time to time. I think Vicki may get tired of my questions!!
Be sure and get furbaby in some water and teach him to swim now. Even a baby pool will work.
That was really great to see how you do your quilting. It looks a lovely quilt - someone is to be a very lucky person. and Ohhh what a gorgeous puppy.
Does that type of quilting work the same for free motion? I was thinking it would be easier to do the quilt in the ditch first, then the middle quilting, but was worried about puckering.
Debbie
Greetings from Tunisia! I've been enjoying your blog while trying to beat the heat. I especially liked your challenge quilt--very interesting technique, good design and lovely colors.
best, nadia
It's gorgeous!
Happy blogoversary :)
Post a Comment